Walkthrough - Setting up Pre-Printed Bar Codes
In this walkthrough, you will learn how to pre-print bar code labels. When receiving, you can attach a pre-printed label to an item, and as you receive the item in Floor, the data will be associated with the bar code and stored in the Bar Code Tracking Entries window. When the pre-printed bar code is scanned at a later time, JustFood will find the bar code in the Bar Code Tracking Entries window along with the associated data.
About This Walkthrough
This walkthrough provides an overview on how to do the following:
Story
Rather than using the vendor labels, the JustFood Company puts their own label on each item that is received.
The pre-printed bar code is based on the BC number series that was created.
Prerequisites
- A Bar Code number series was created on the No. Series List window.
Setting up the Pre-Printed Bar Code
You need to define the bar code that will be on the pre-printed label.
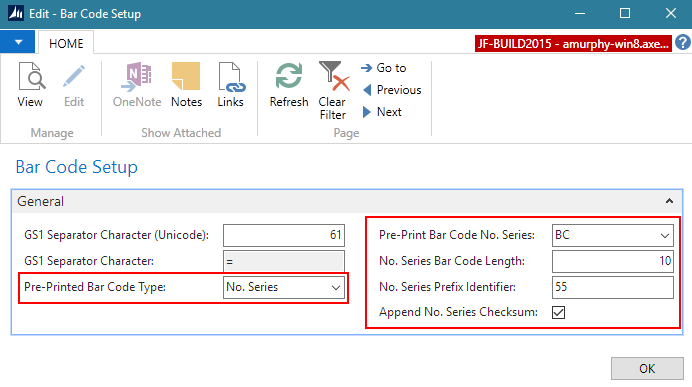
Open the Bar Code Setup window.
In the Pre-Printed Bar Code Type field, select No. Series.
In the Pre-Printed Bar Code No. Series field, select the bar code number series that was created. This number will be incremented each time a pre-printed bar code is created.
In the No. Series Bar Code Length field, enter the length of the bar code. The length needs to be the same as the number of characters in the number series selected for the Pre-Printed Bar Code No. Series field. The length does not include the prefix or check sum. The length is used to help identify the bar code when it is scanned.
In the No. Series Prefix Identifier field, enter the prefix that will be added to the beginning of the number series. The prefix is used to help identify the bar code when it is scanned. A double-digit prefix starting with 5 or 6 is suggested since no application identifiers start with those numbers.
In the Append No. Series Checksum field, select the check box to add a checksum to the end of the number series. The checksum is used to help identify the bar code when it is scanned. The checksum is calculated based on the weighted sum of the digits in the bar code.
Close the window.
Pre-Printing Bar Code Labels
The pre-printed bar code labels can be printed ahead of time so that they are ready to go when items are received in to the warehouse.
Open the Pre-Print Bar Code Labels report.
Select No. Series in the Pre-Printed Bar Code Type field.
In the Number of Labels to Print field, enter the number of unique labels that you want to print. Zero still prints 1 label.

- Save and print the report.
Two labels are printed. The 55 is the defined prefix. The BC00000009 and BC00000010 are based on the selected number series. The 7 and 9 are the checksums added to the end of the number series.

A pre-printed label can now be scanned from the Guided Receiving interface in the Floor application, and the data will be saved with the bar code. See the following video for an example on scanning pre-printed bar codes:
Viewing the Pre-Printed Bar Code Entry
Once a pre-printed bar code is scanned, you can see the information that is associated with the bar code. This information will be used the next time the bar code is scanned.
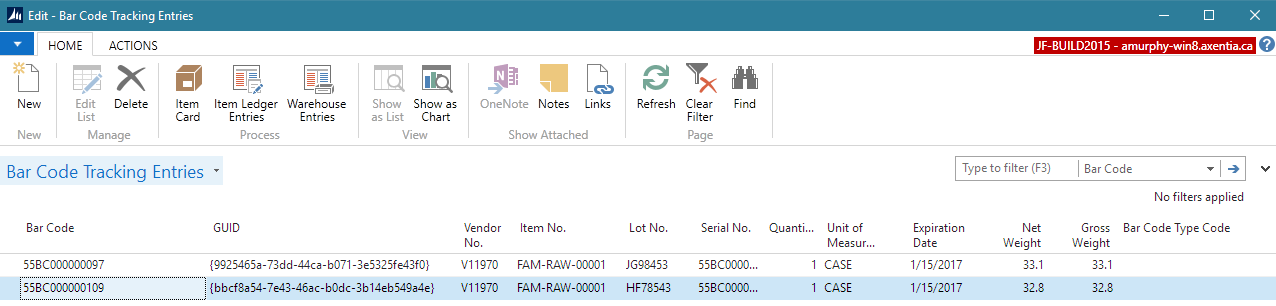
Open the Bar Code Tracking Entries window.
Locate the line that contains the bar code that was printed on your label, and view the associated information.
See Also
About Bar Codes
About JustFood Walkthroughs
© 2018 Microsoft and IndustryBuilt. All rights reserved.
JustFood 2018 (11.00.00.00) | February 2018
